Uplink Topologies
When deploying bare-metal Kubernetes, servers (Machines) can connect to the network fabric through different several different Uplink Topologies,
There are a few common options, balancing simplicity against resiliency and flexibility:
Single-homed L2 Uplink
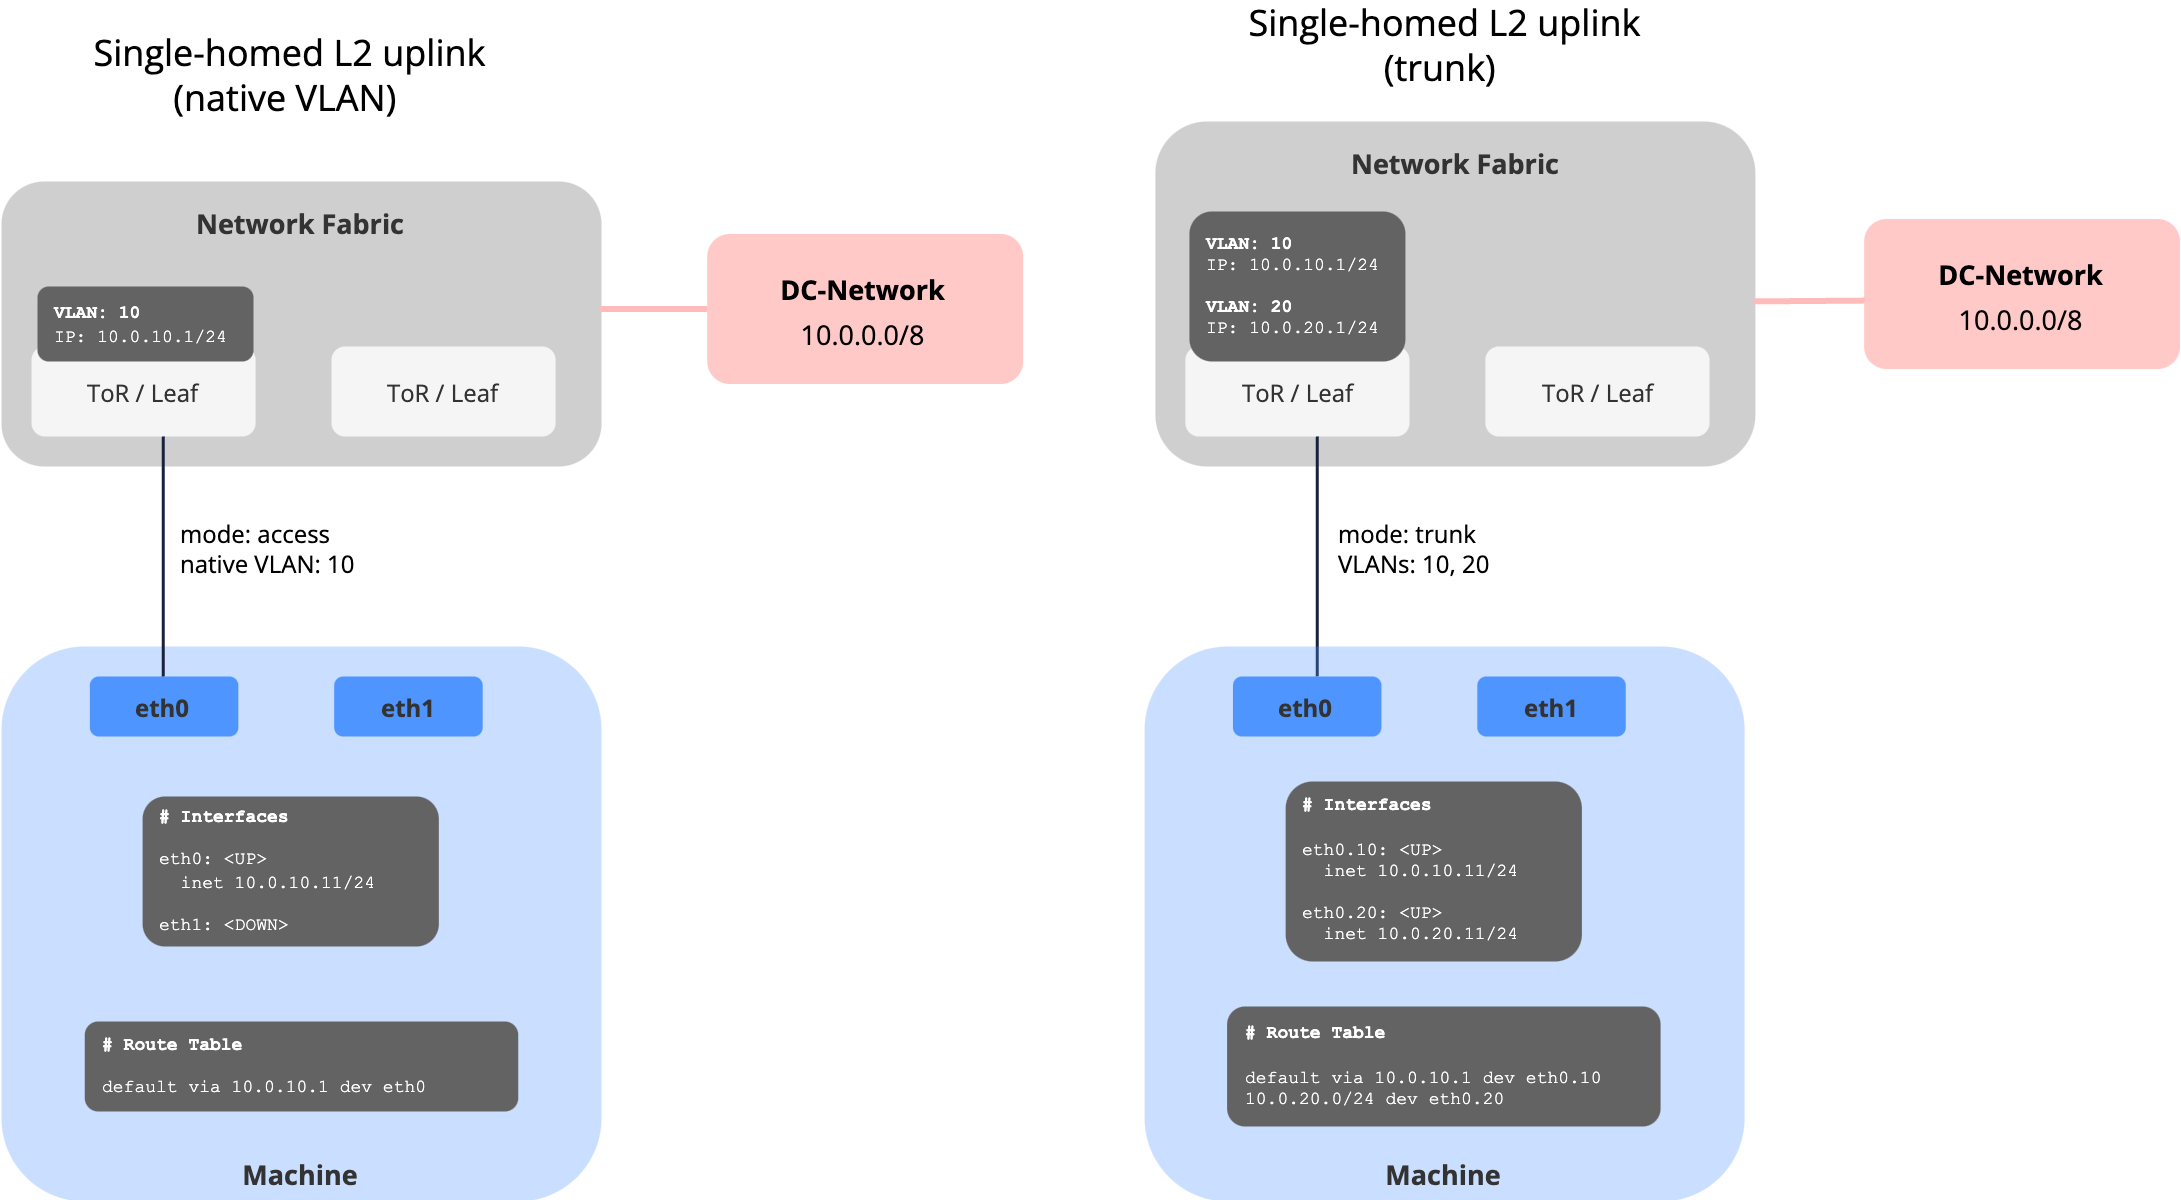
The server connects with a single NIC to one Top-of-Rack (ToR)/leaf switch. The port is configured as either:
- Access port: server lives in a single VLAN
- Trunk port: limited set of VLANs are allowed to the host
When it’s used:
- Lab, test, or proof-of-concept setups
- Small edge or branch deployments
- Environments where high availability isn’t required
| Pros | Cons |
|---|---|
| Very simple to configure | Single point of failure (NIC or switch) |
| Minimal operational overhead | Limited scalability and resiliency |
| No special features required | Not suitable for production-grade high availability |
Dual-homed L2 Uplink with Link Aggregation
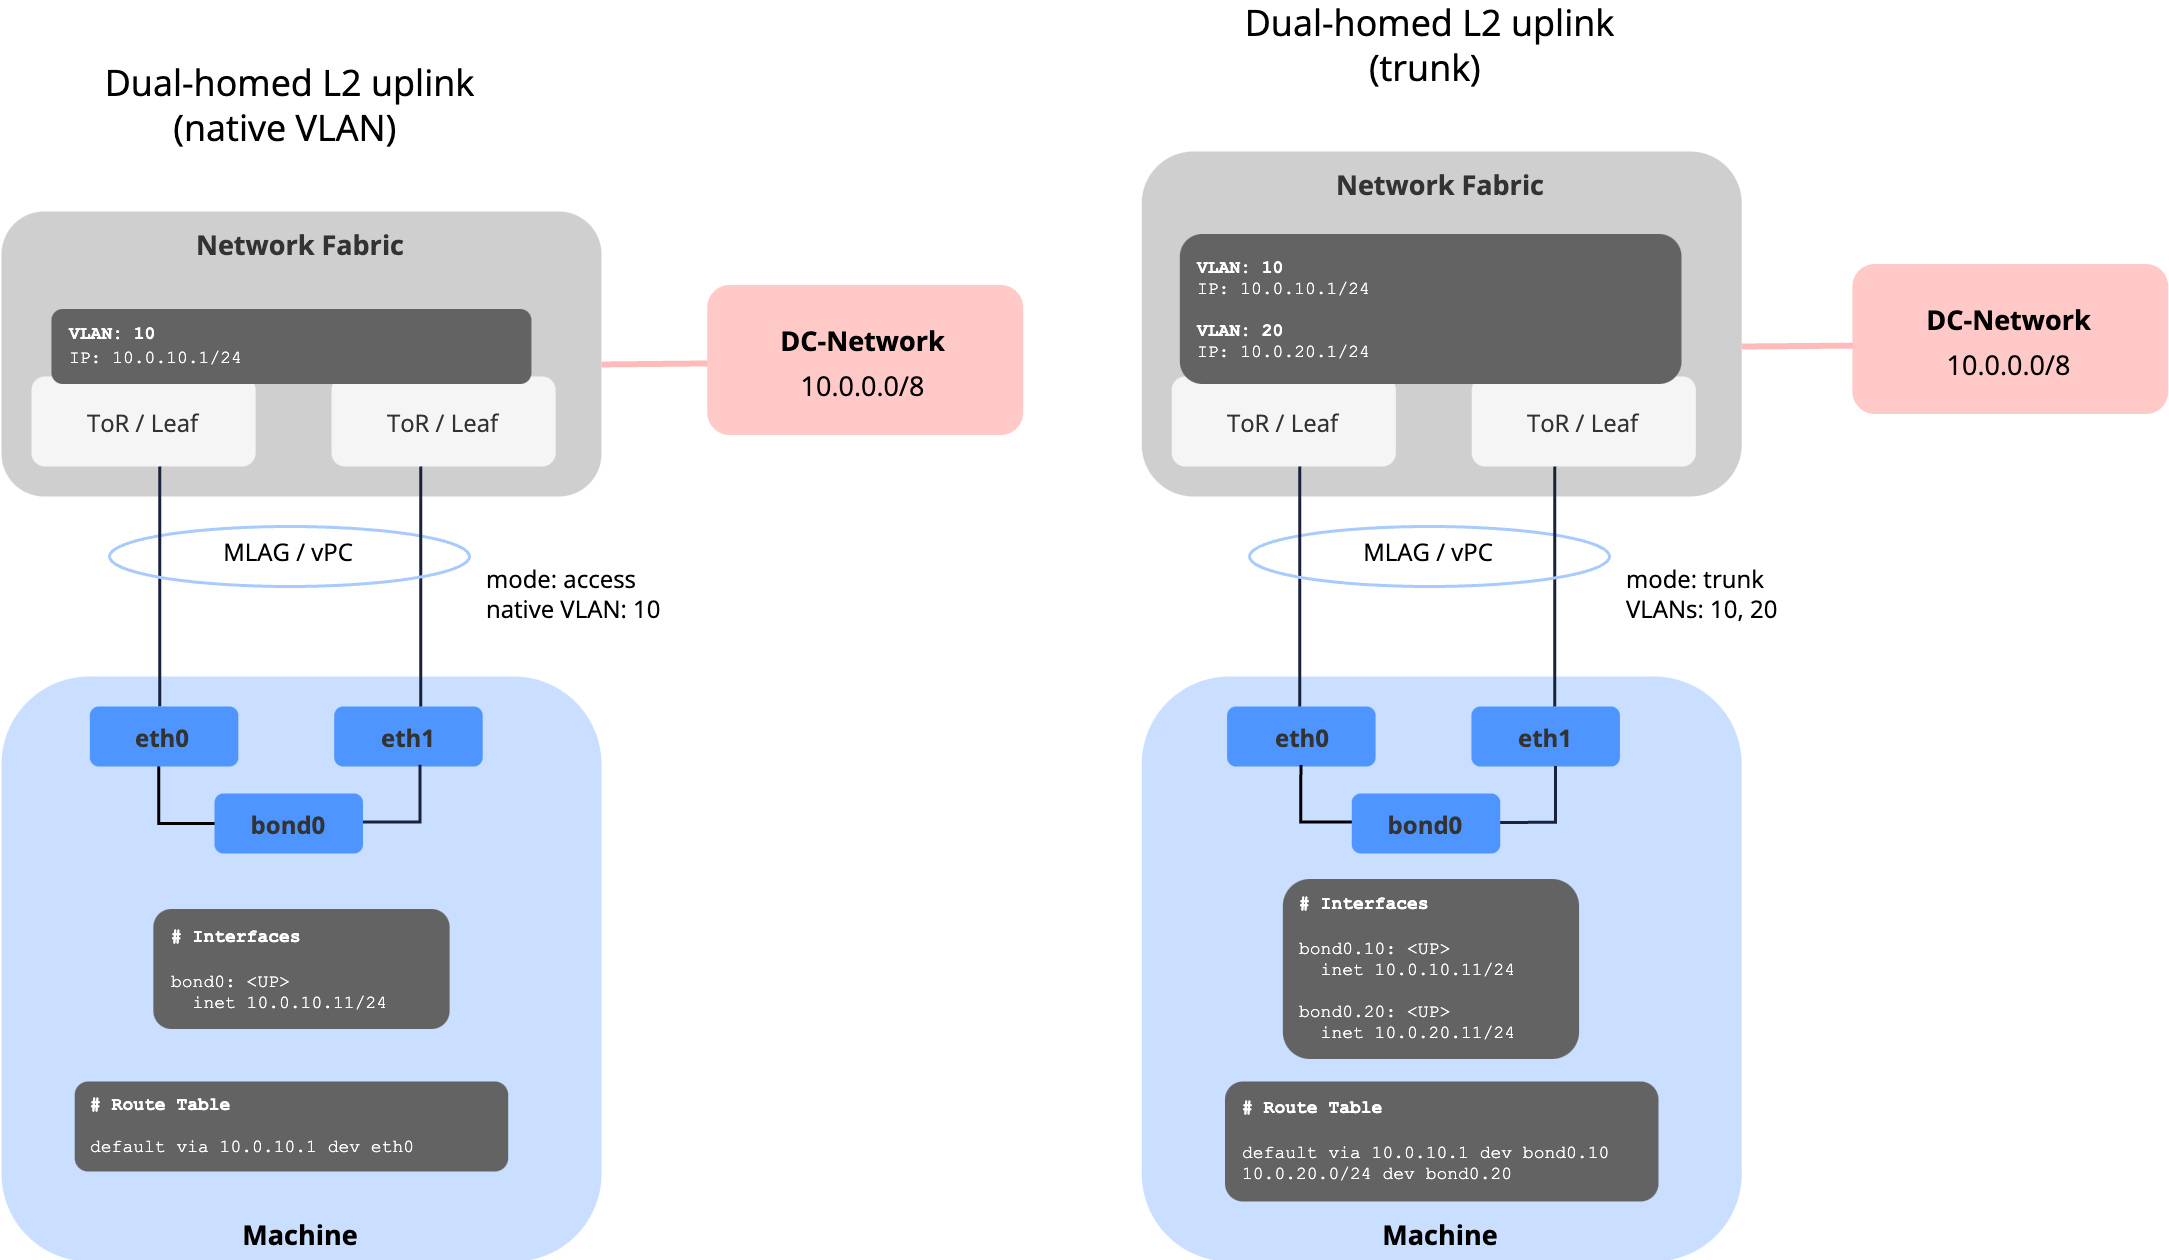
The server uses two (or more) NICs, bonded together (e.g. LACP 802.3ad or active/standby).
The uplinks connect either:
- To the same switch (classic port-channel), or
- To a pair of switches in MLAG/vPC/stacking mode for redundancy.
When it’s used:
- Most common setup in enterprise production data centers
- Environments where redundancy and higher bandwidth are important
- Default choice for mission-critical workloads without advanced routing requirements
| Pros | Cons |
|---|---|
| Provides redundancy (NIC or switch) | Requires MLAG/vPC/stack config on switches |
| Higher bandwidth with active/active | Limited to L2 — scaling across racks is harder |
| Still simple compared to routed BGP | Troubleshooting can be harder if LACP/MLAG issues occur |
Next, check out how Network Profiles can be used to model the different Uplink Topologies in meltcloud.